
I’m Used to a Stair with Some Stares
(If that “Arrested Development” reference means nothing to you, just let it go.)
When we moved, our house was what they call move-in ready. We had to do absolutely nothing to move in (other than desperately try to squish all our belongings into a much tinier house). But of course what “move-in ready” really means is that it’s painted in some nice neutral colors that you will come to hate and become desperate to do something about. And, in our case, that it had fresh carpeting all up the stairs and in the upstairs bedrooms. Problem: we hate carpeting. It’s really never clean, it’s terrible for people with allergies, and this was that shade of oatmeal beige that got dirty just by existing. I tore it out of two of the bedrooms before we had even moved, but it remained on the stairs. I hate carpeting on stairs even more – it always feels like I’m going to trip. I like to connect with a tread. So, eventually, the stair carpet had to go.
Of course, that left the question of what was under the carpet. In our old house, removal of several layers of dense enamel paint had revealed absolutely gorgeous maple stairs that were worth the roughly two years it took me to actually finish the job. In this house, I found what I have found everywhere in this house: old pine. So the decision was whether to rehab soft, splintery old pine, or do a full replacement. Thought I’d try the rehab first. This is what was under the carpet:
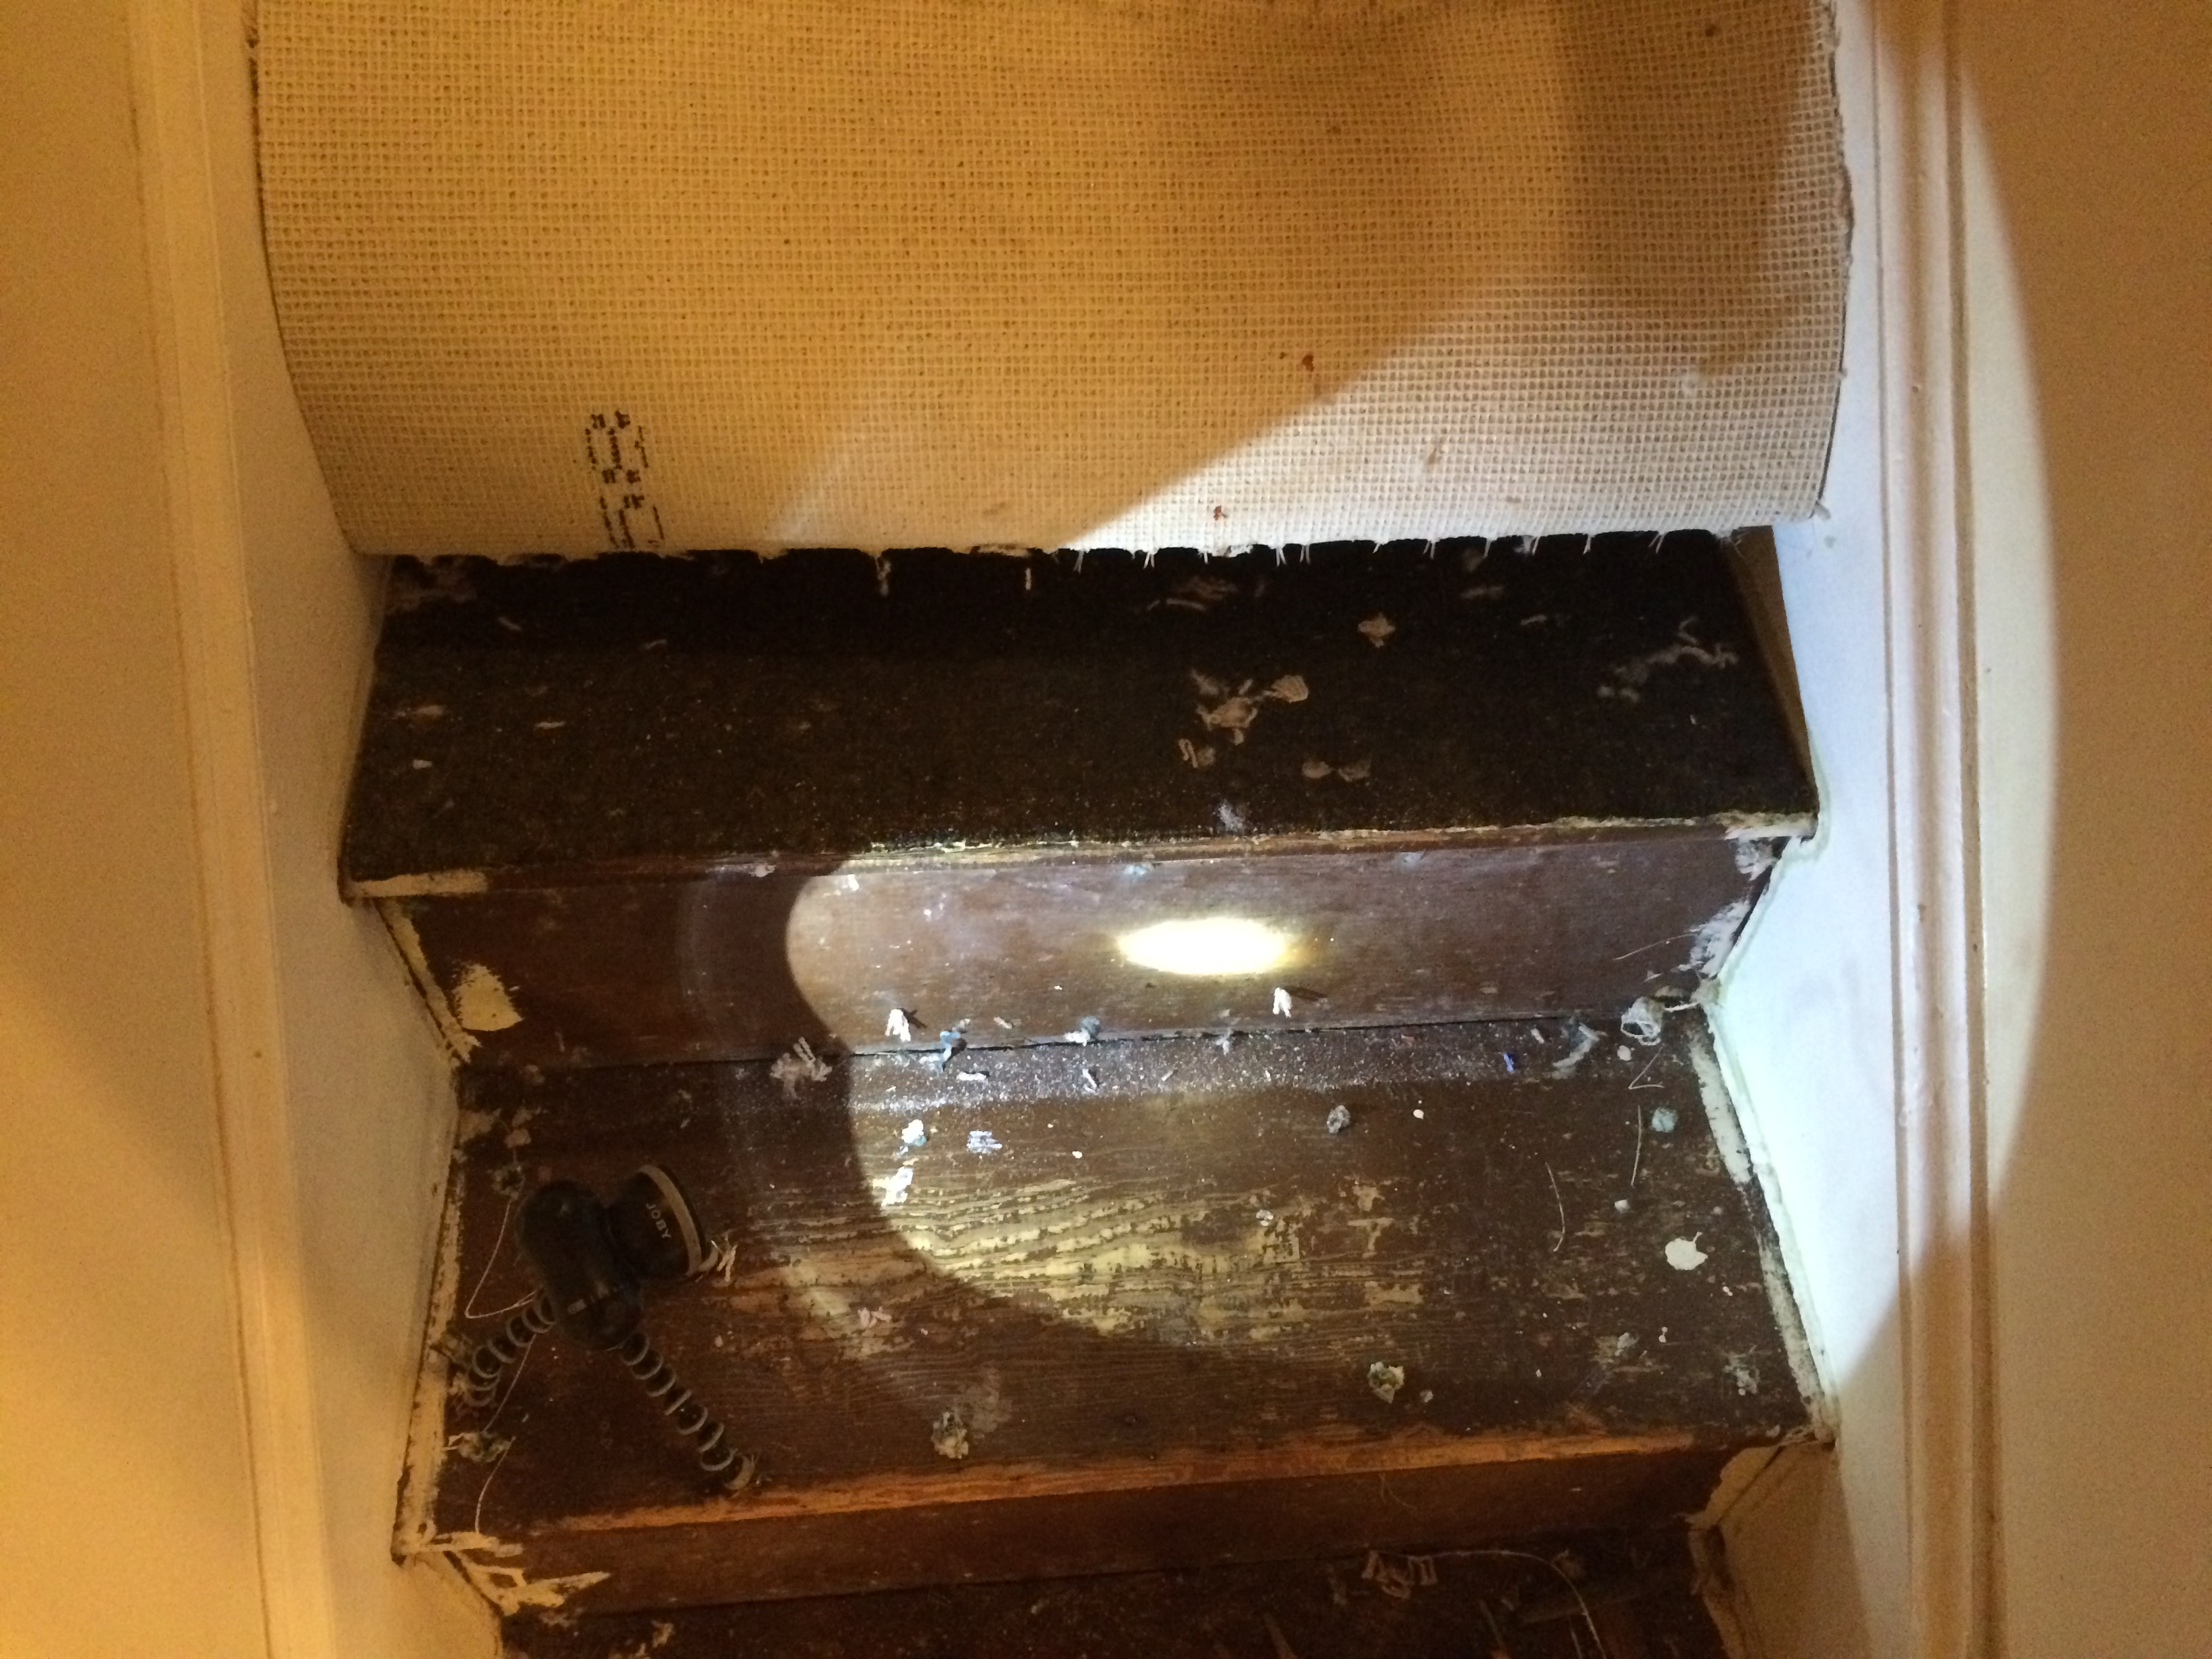
So, the good news was that they weren’t heavily painted. The bad news was that they were painted just enough, and rough and splintery enough, that getting down to bare wood and whacking it with a thick coat of polyurethane wasn’t going to work. The answer would have to be paint.
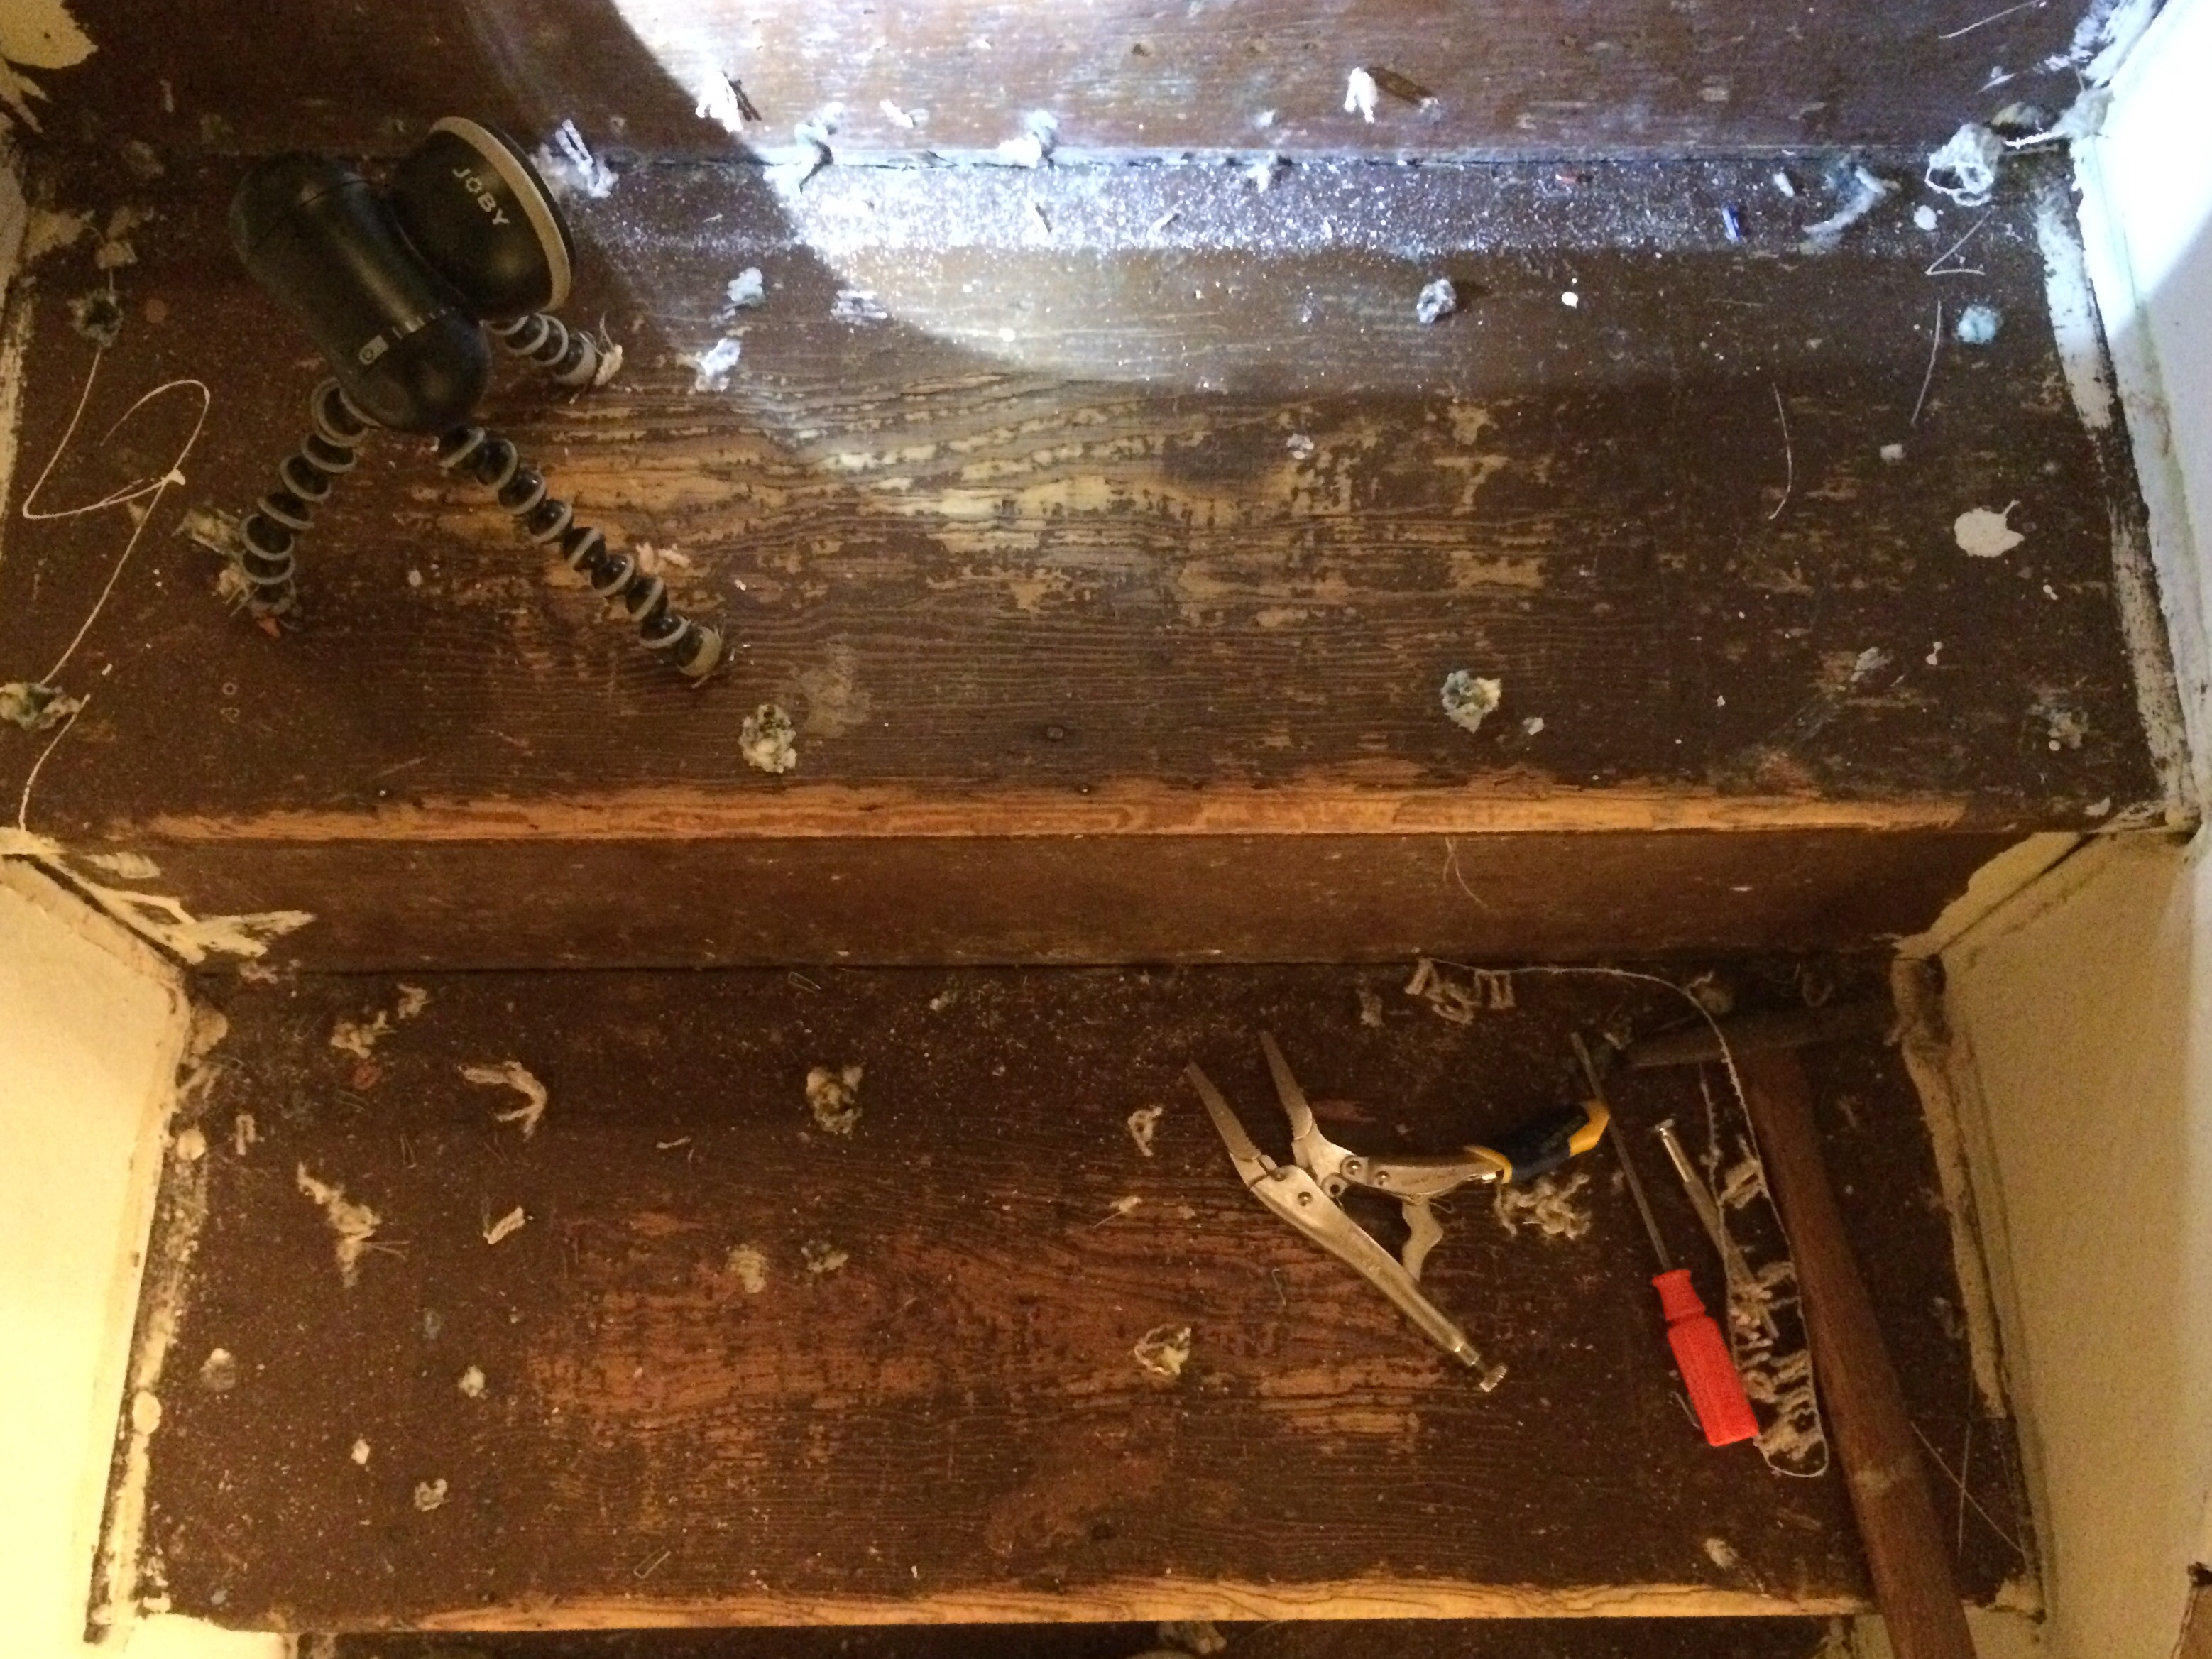
First, I would have to remove approximately four million staples. Whoever put in this brand new carpet that I despised, I would highly recommend for a carpeting job. They did it beautifully. Even trying hard, it was a massive chore to get that carpet off the stairs. And every single one of those staples had to be pulled out by hand. Even by the time I was ready to paint, I was still finding some hidden staples.
So, there was the issue of figuring out paint. I found a couple of rather elegant paint patterns that I liked, including something with a set of highlighting stripes that I thought would make some plain old pine stairs look quite nice. What I wasn’t sure of was whether it would be possible to create nice smooth stripes on such rough old wood. Even with significant sanding (oh, and there was sanding), you can only get this stuff so smooth.
Yeah. Not so smooth. But we decided to go for it anyway, and figured if we hated it in the end, we could just start all over and replace the stairs entirely. So, final sanding and then two solid coats of Kilz high-hiding primer:
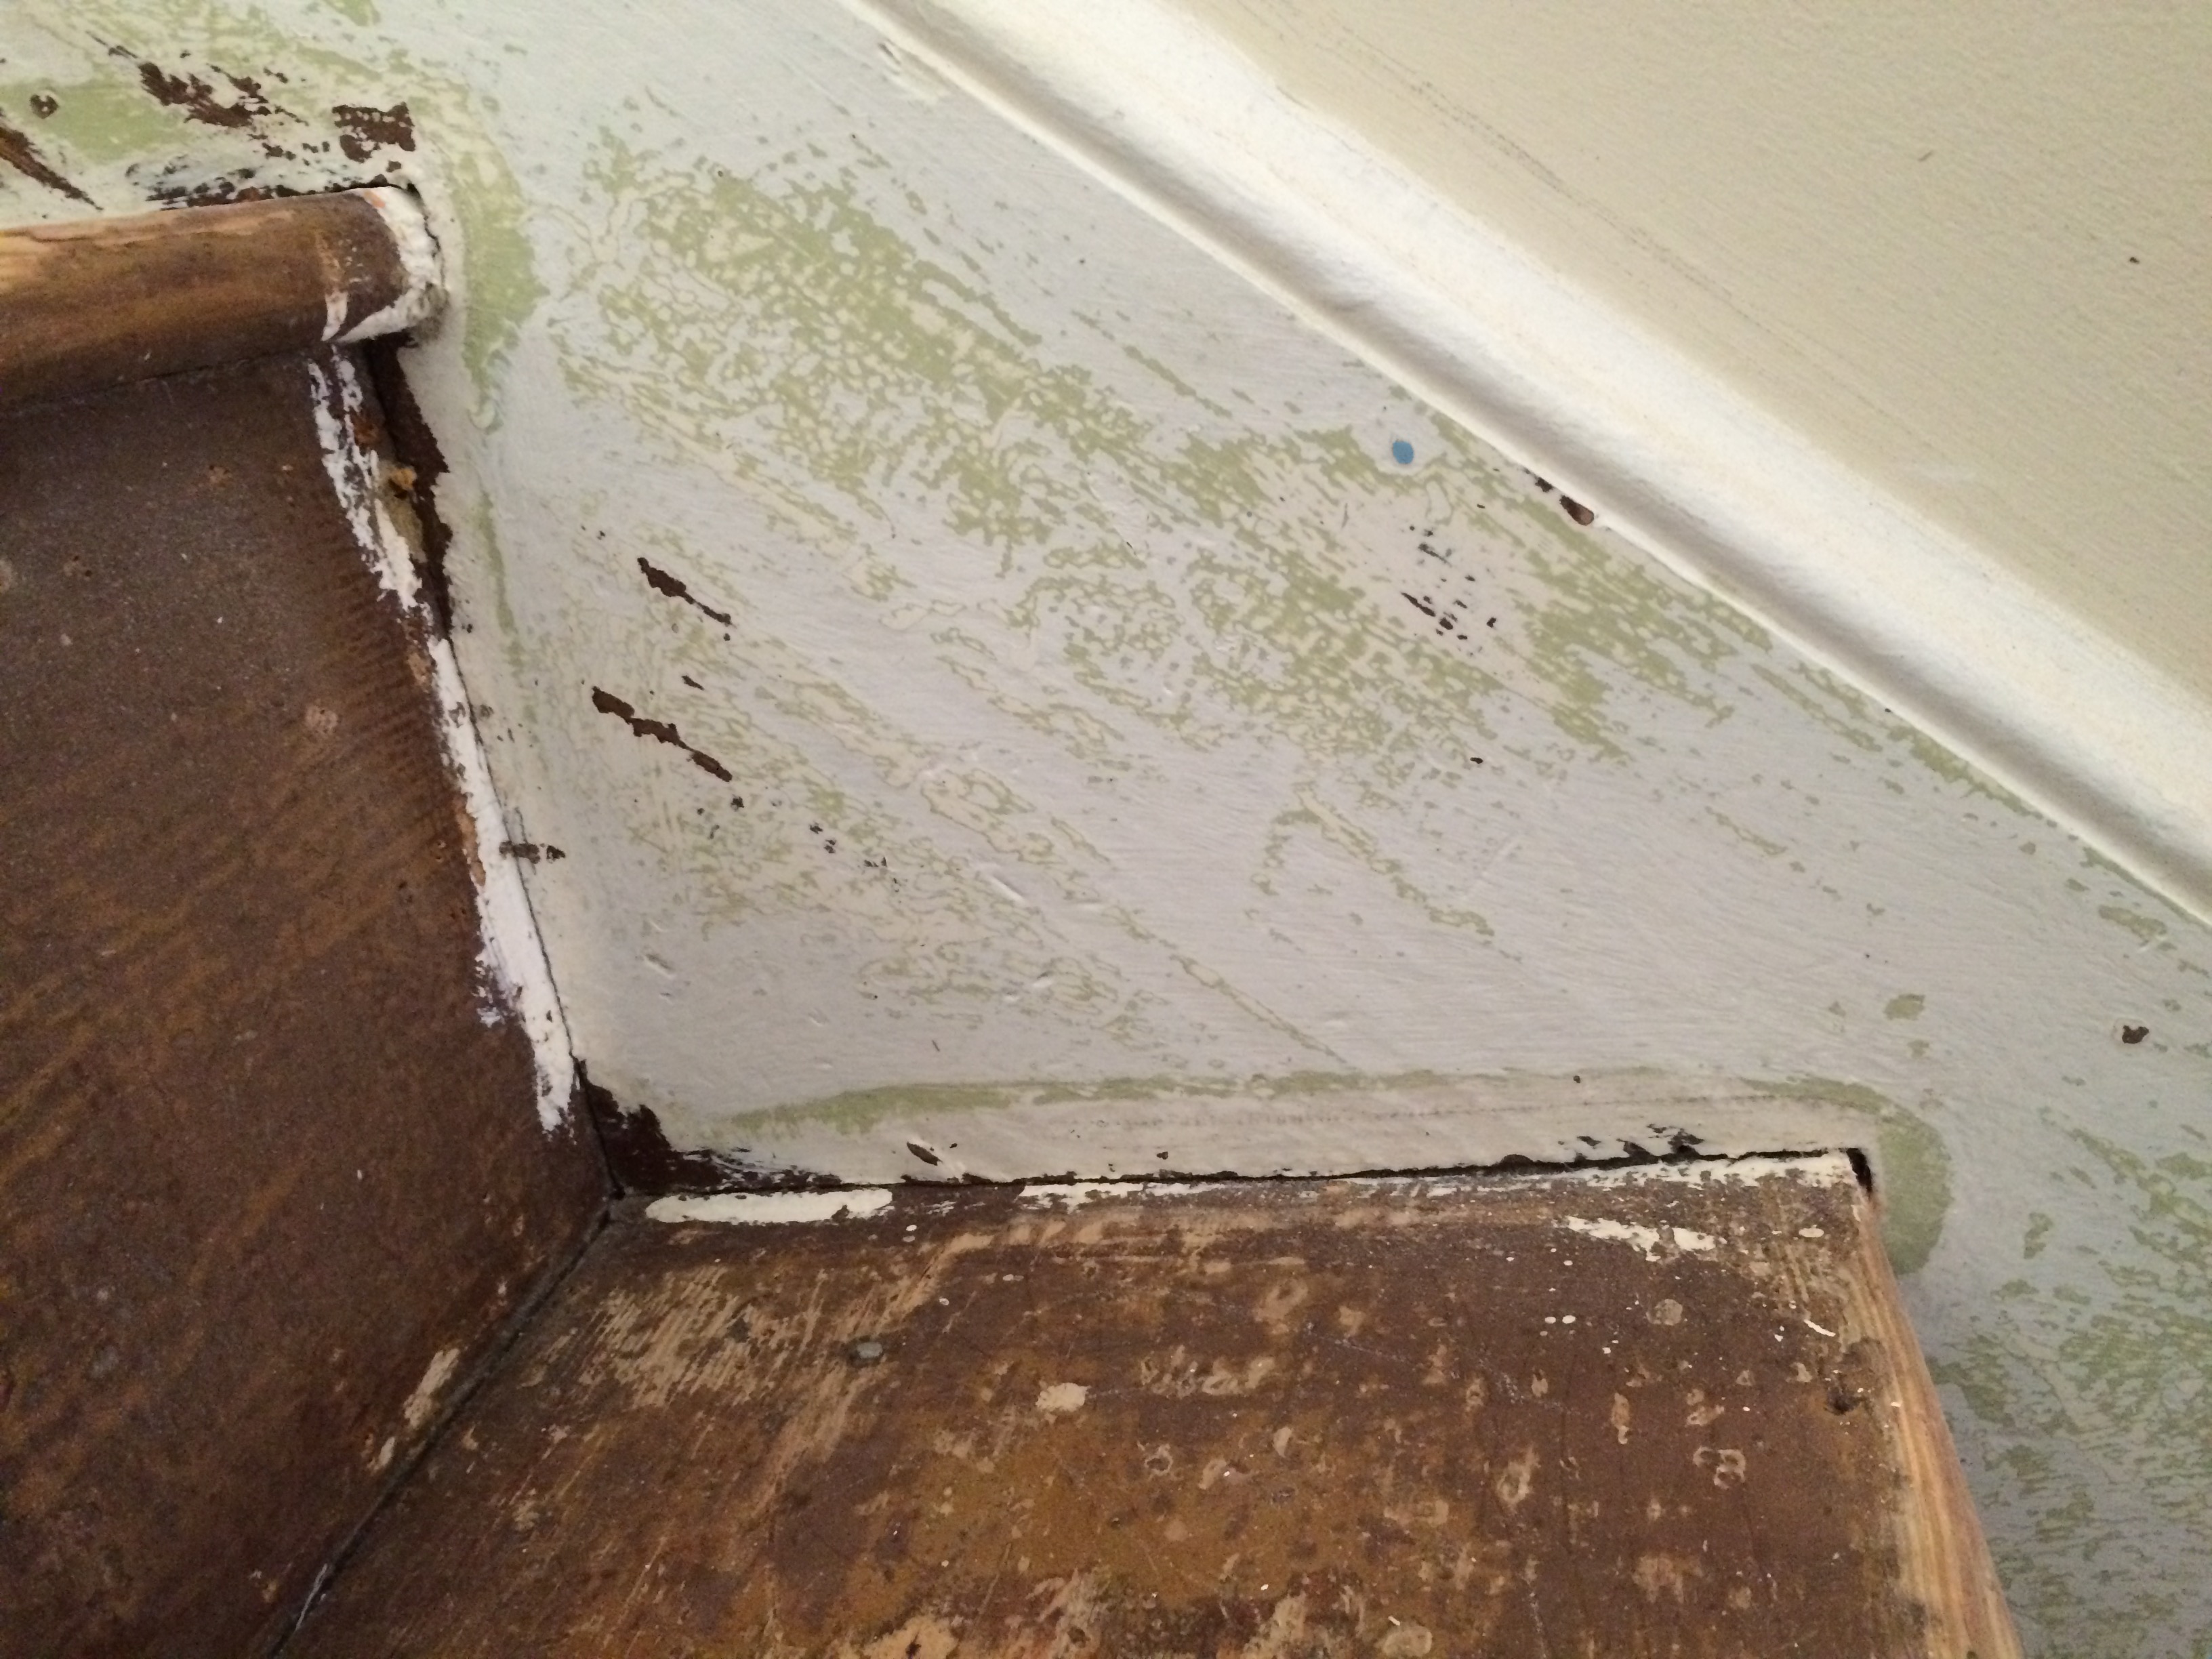
You’ll note the weirdness of the lack of balusters and banister on the right. What was there was a horrible piece of cheap pine, poorly arranged, that took the place of where railing setup would normally be. We liked the openness and didn’t want to enclose the space, but we had to have a nicer piece of wood. We thought about several fancier treatments, including using some live-edge wood that would have been an interesting effect, but in the end decided to make it simple.

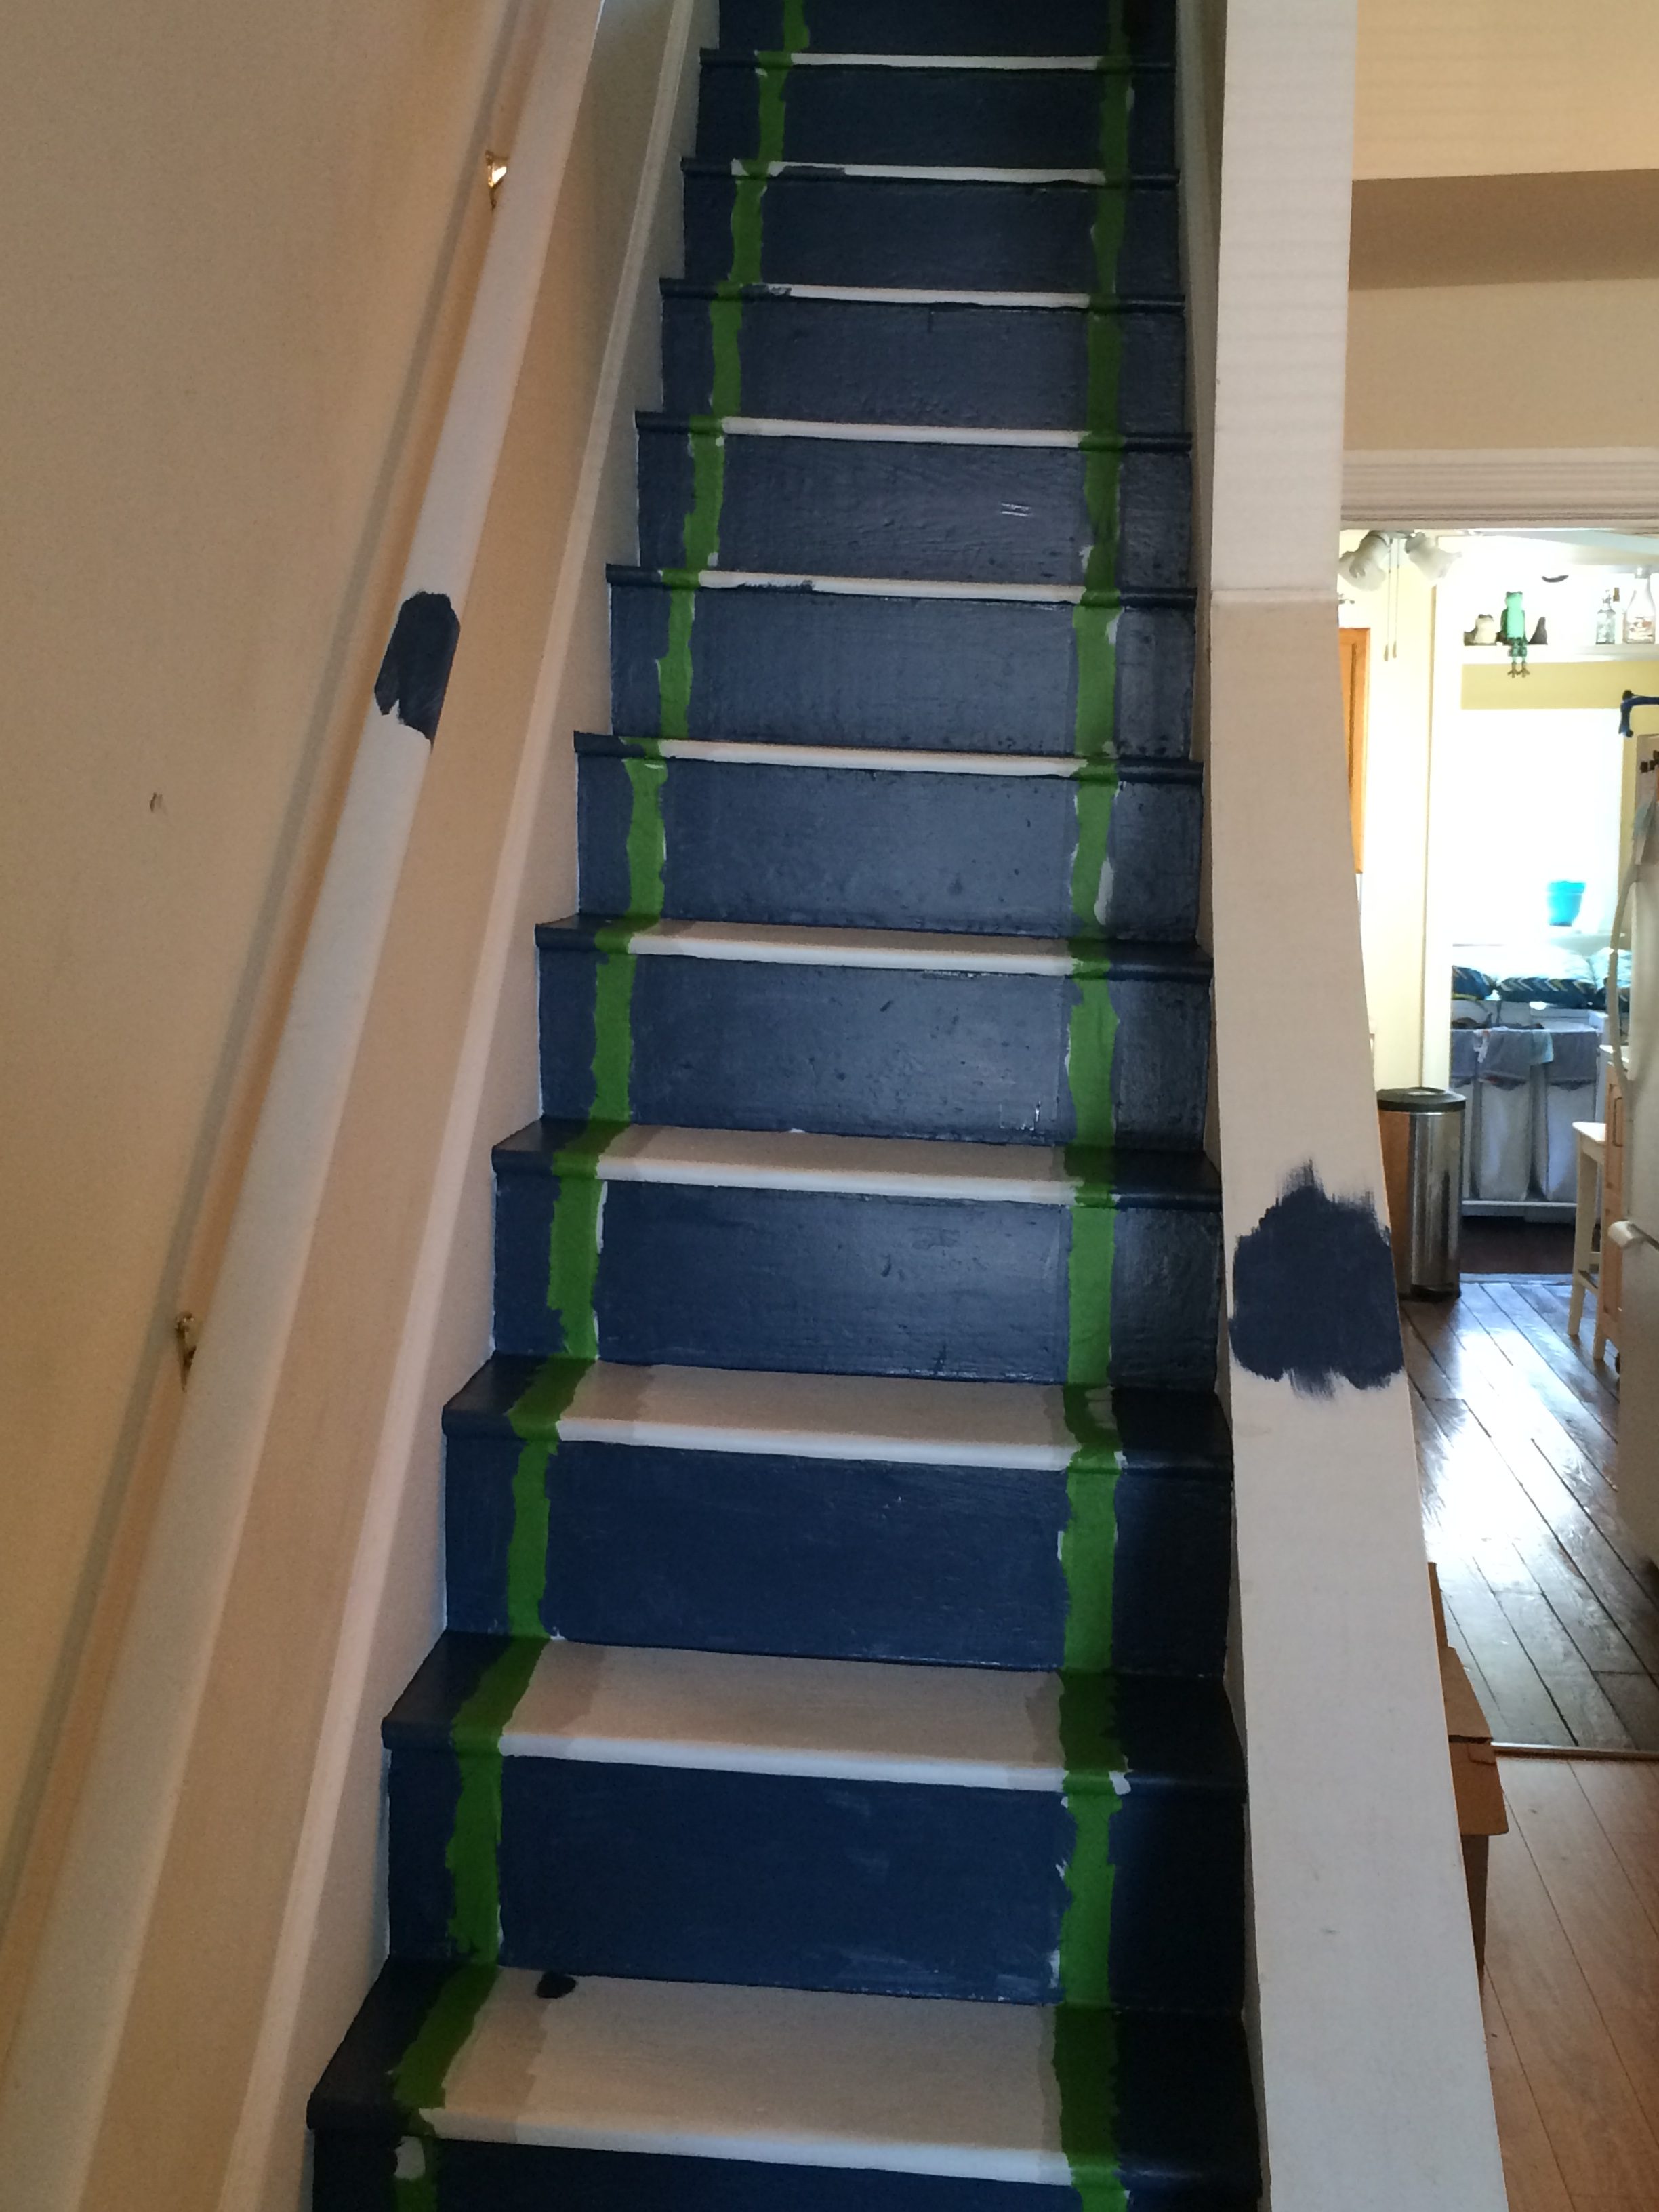
To make the stripe, first I painted the color I wanted the stripes to be on the treads and risers. Then, I had to bring the tape down over that color, and I would then paint the darker color everywhere the tape wasn’t. The cardboard is a template for laying the tape because this was, of course tricky. The house was built in 1900. The stairs are not the same width at the top as at the bottom. If I put the stripes a uniform distance from the left or right walls, they would have ended up looking very funky. So I had to pick a spot at the top of the stairs and run down from that, keeping the space between the stripes exactly the same but letting the outside margins drift.
I used Frog tape, which many blogs said would work better than the traditional 3M blue painter’s tape, particularly on a less than smooth surface; those folks turned out to be right. It was a bit tricky getting it tucked into the corners perfectly where the treads met the risers, and wrapping it around the bullnose nicely while still maintaining something like a straight line, but it worked out pretty well.
Then, and this was absolutely key, I painted over the edges of the tape in the color of the stripe. That would prevent the darker color from leaking under the tape, because if there was to be any leakage, the lighter color would have already done it. So: paint the color you want to protect, tape over it, then paint the edges of the tape the same color. It’s brilliant.
Then comes the main color, the dark blue. Here you can see it applied to most of the risers and the sides of the treads – that was so we could still go up and down stairs while a portion of it dried. I used porch and floor paint from True Value that dries pretty quickly and pretty hard, but it still preferred to rest for a couple of days before getting really challenged. I waited to do the treads until Lee was going to be out of the house for the weekend and I could try to just walk up the edges while they dried. Here you can see I was also deciding whether to paint the railing and the not-a-baluster board the same color.
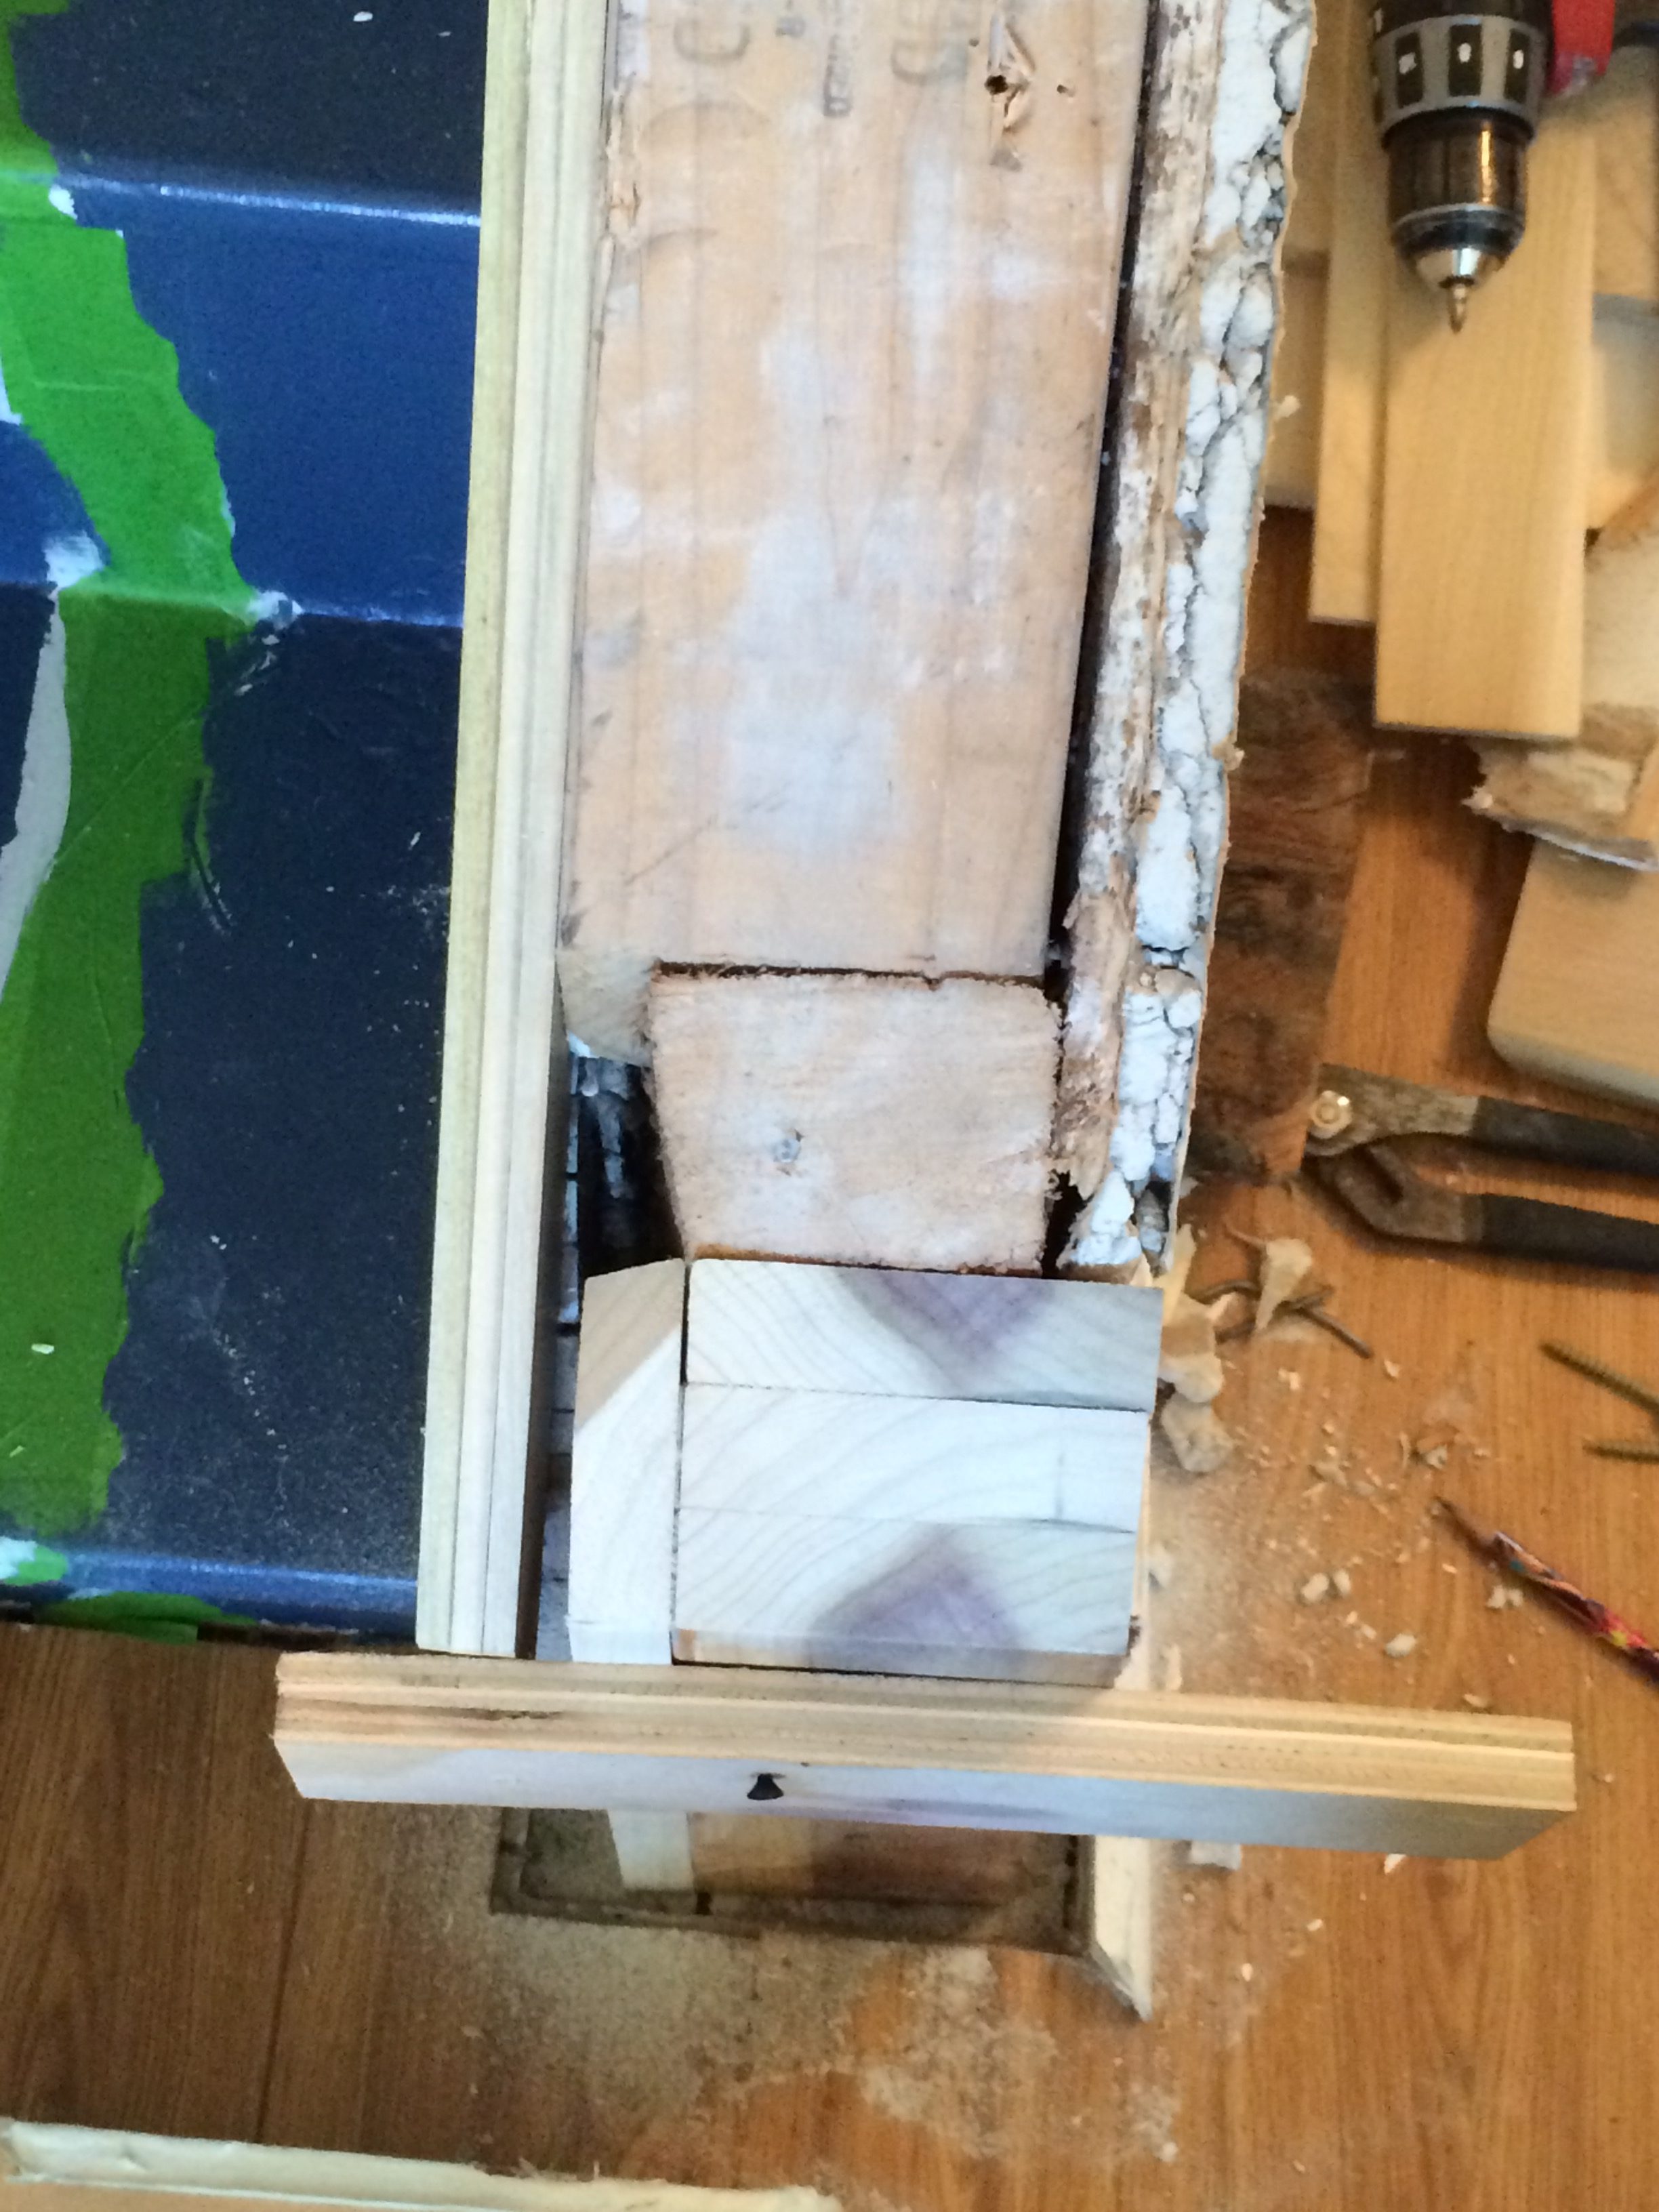
Then, of course, came the problem. That cheesy piece of wood wasn’t ever really set in place right, and didn’t have a proper support underneath, so when it was time to replace it, I had to cobble together a new support column.
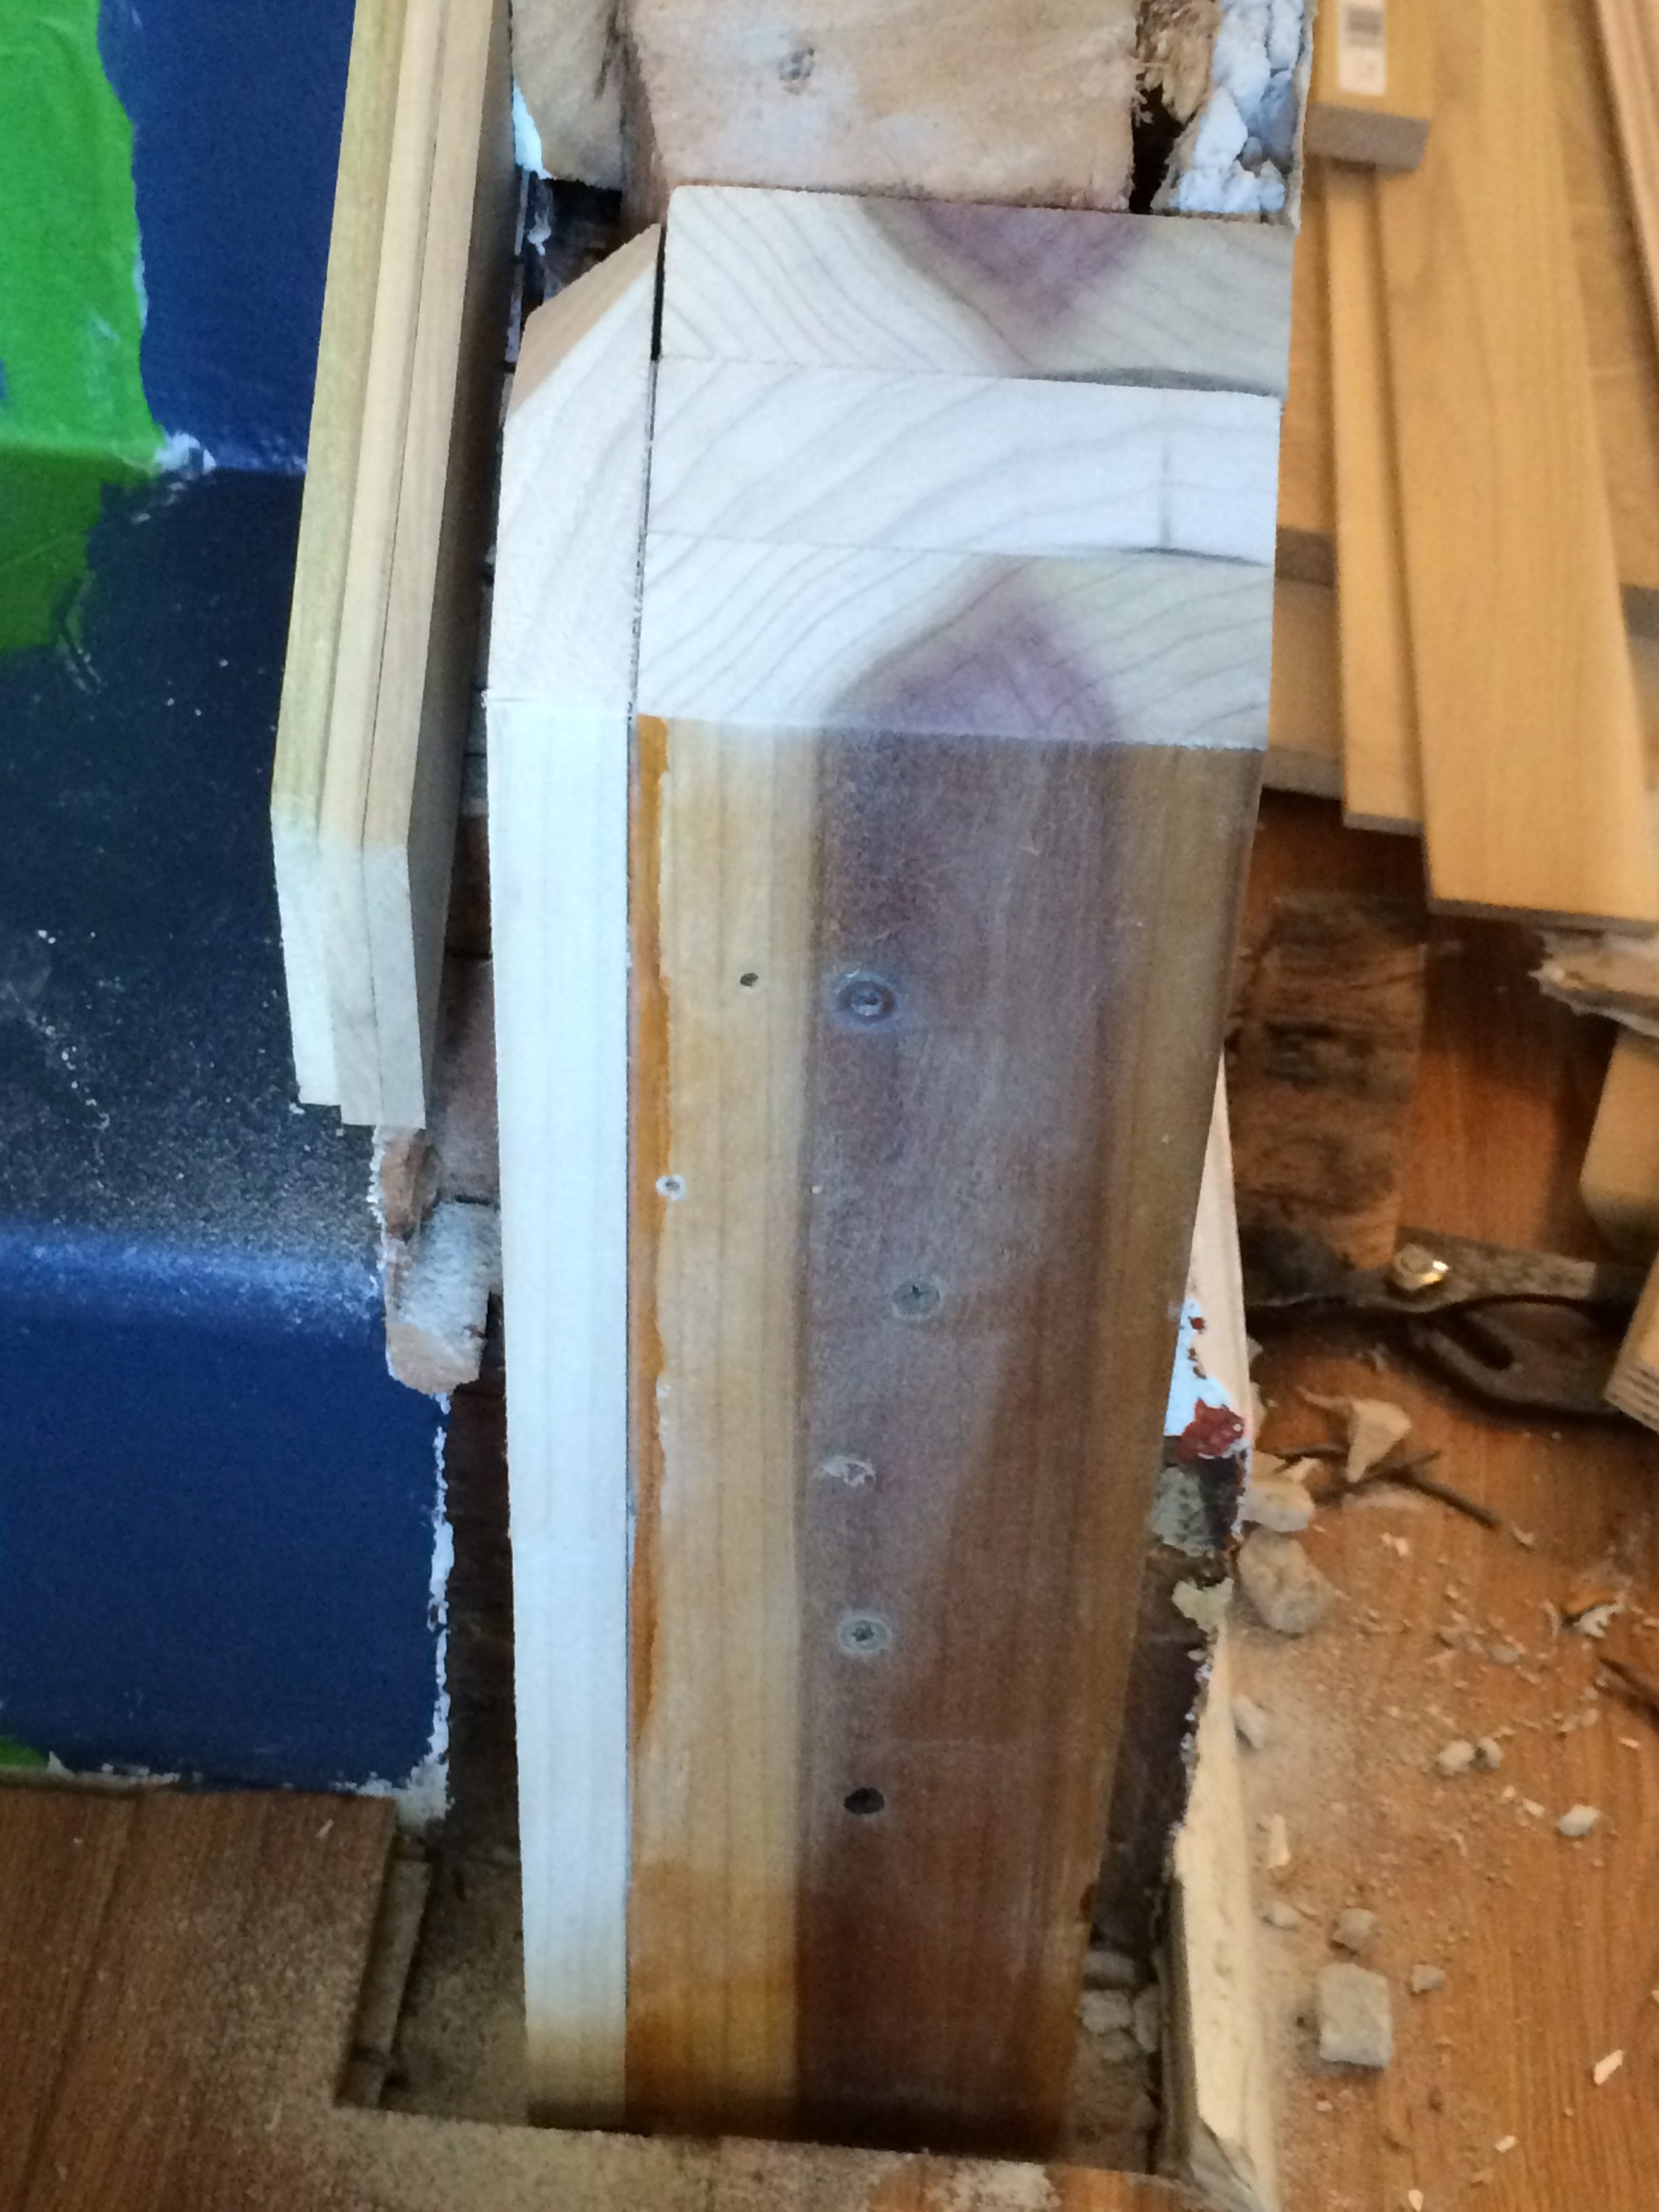
There was much checking of angles, let me assure you. I’m terrible with angles.
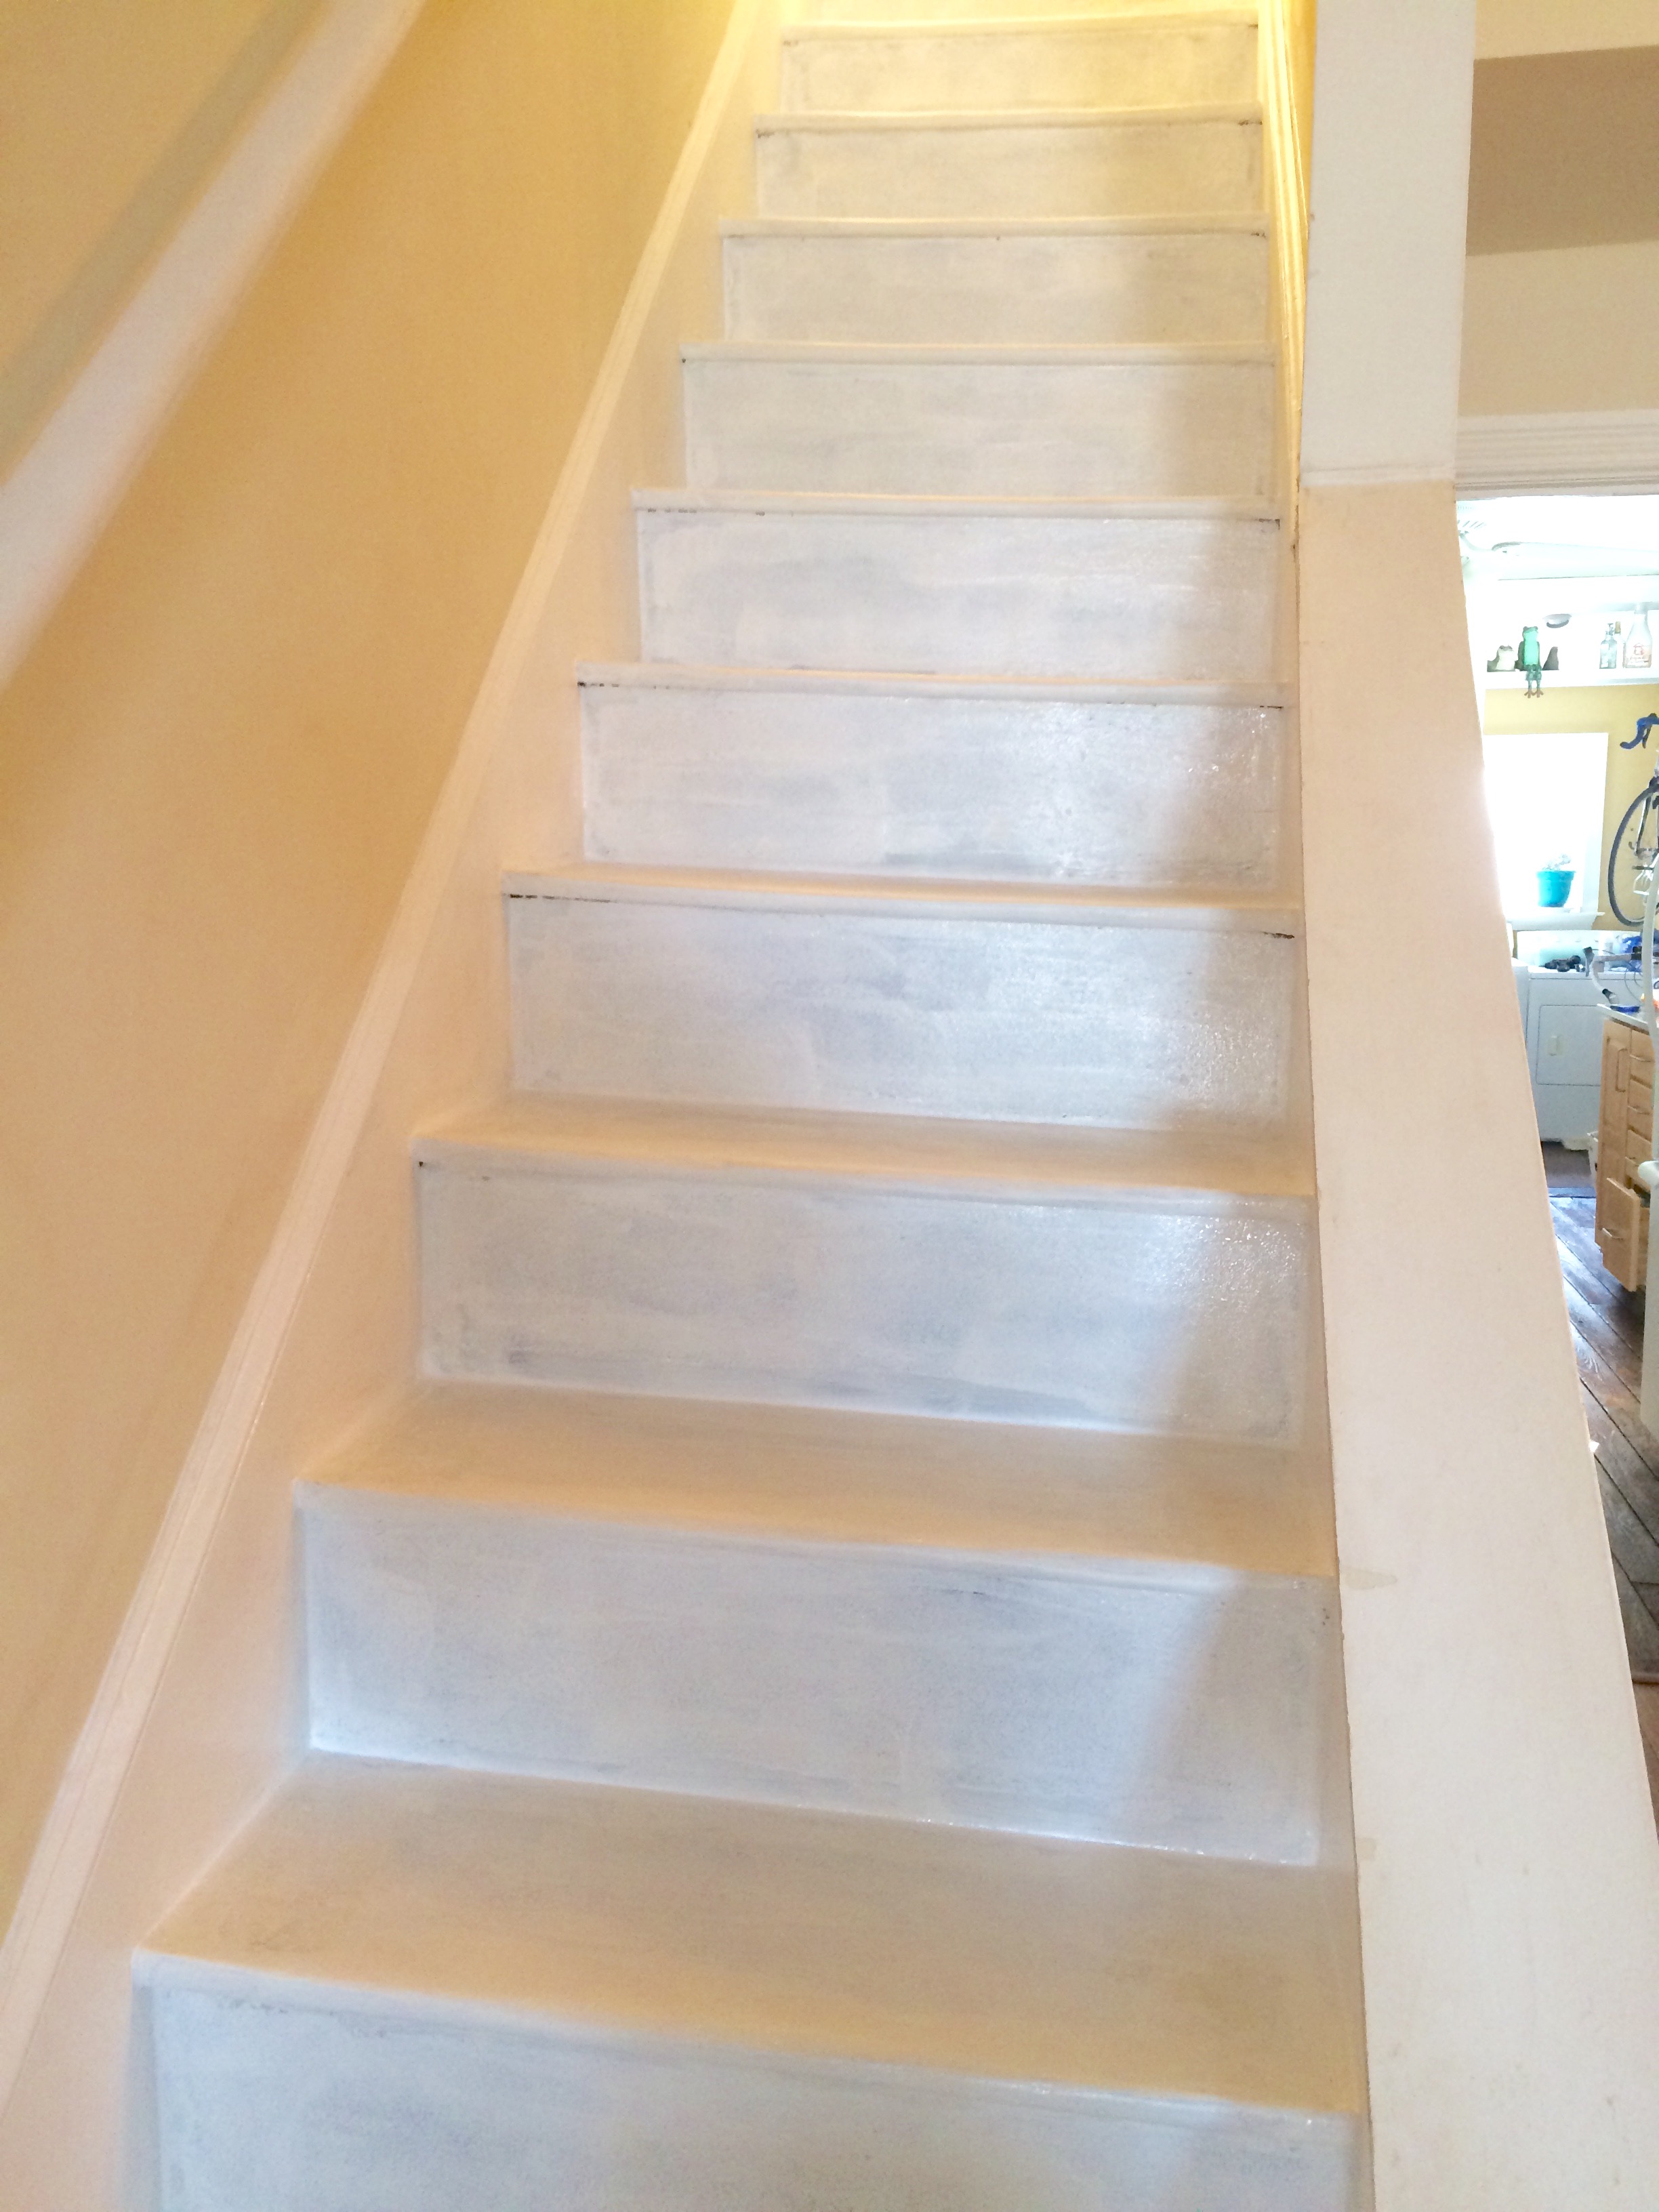
Then came the moment when I could take off all the tape. My history with the blue tape is that inevitably I would snag a strip of paint at some point and undo some of my work, and then have to go back and touch up. That did not happen with the Frog tape. There was absolutely minimal leakage – just in a couple of spots where I hadn’t been able to get the tape tight enough as it came through a corner – and the lines were razor sharp. I ended up doing just the slightest amount of retouching, all of it in the corners. The rest of it was amazing. Here’s how it came out:
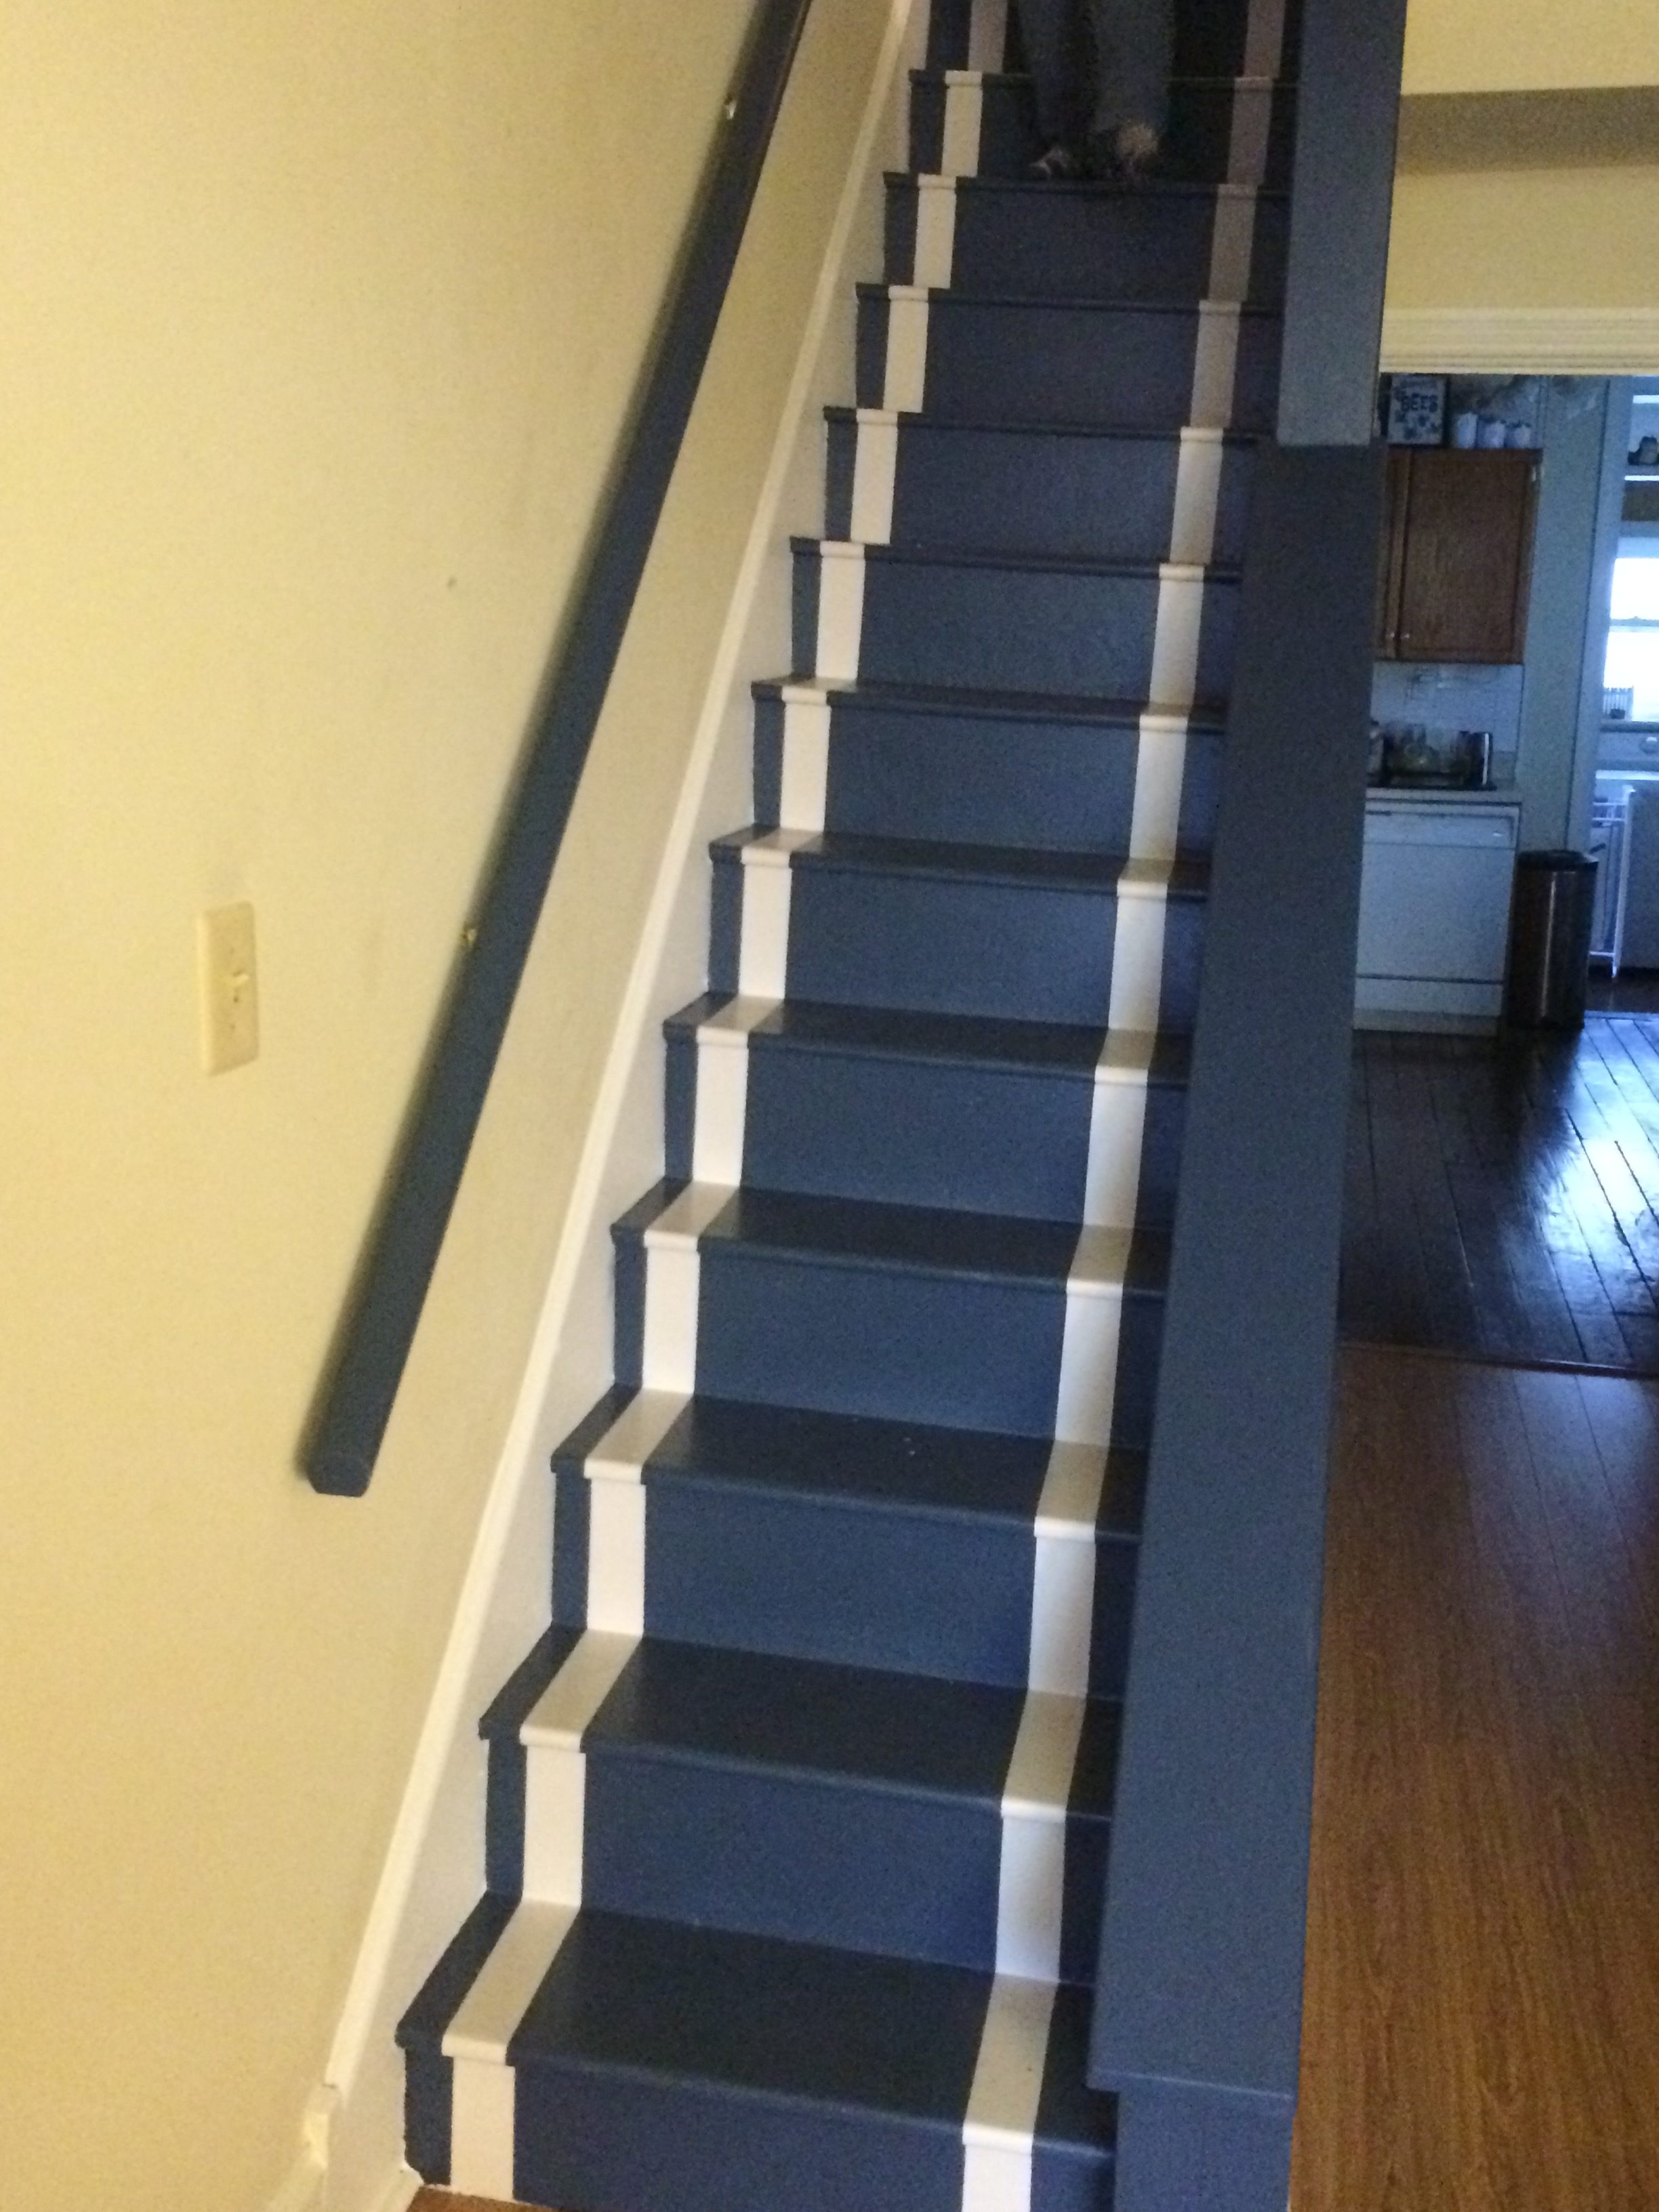
Nice, is it not? The iPhone and the ambient light aren’t really capturing the color here. Trust me, it came out pretty sweet.
One Comment